Choosing a 3d Wpc Wall Panel is not only a matter of matching color with furniture. The panel must suit the room’s moisture, lighting, ventilation, and daily use. A warm walnut finish may look elegant in a showroom, yet appear too dark beside a small window. A deeply grooved surface can create character, but it may collect dust in busy commercial spaces.
Lena Hoffmann, a building-materials consultant, offers a useful reminder: “A wall panel should be judged by performance before appearance.” That principle deserves attention. Buyers should check the panel’s core composition, surface coating, dimensional stability, fire classification, and indoor-emission information. Do not trust photographs alone. Hold a sample near the actual wall. Touch the texture. Inspect the edge profile.
Small details matter.
The right 3d Wpc Wall Panel should also match the installation method. Some systems require furring strips, while others attach directly to a prepared surface. Uneven walls may need extra preparation. That cost is easy to overlook. So is future access for repairs.
This guide explores seven practical tips for choosing panels with greater confidence. It considers visual proportion, moisture exposure, durability, acoustic expectations, maintenance, installation requirements, and supplier reliability. The advice is useful, but not absolute. Every project has different conditions. Even experienced buyers can misjudge lighting or underestimate labor.
That is why careful comparison matters. Ask for technical documents. Review warranty terms. Confirm batch consistency. A beautiful wall is valuable. A dependable wall is better.
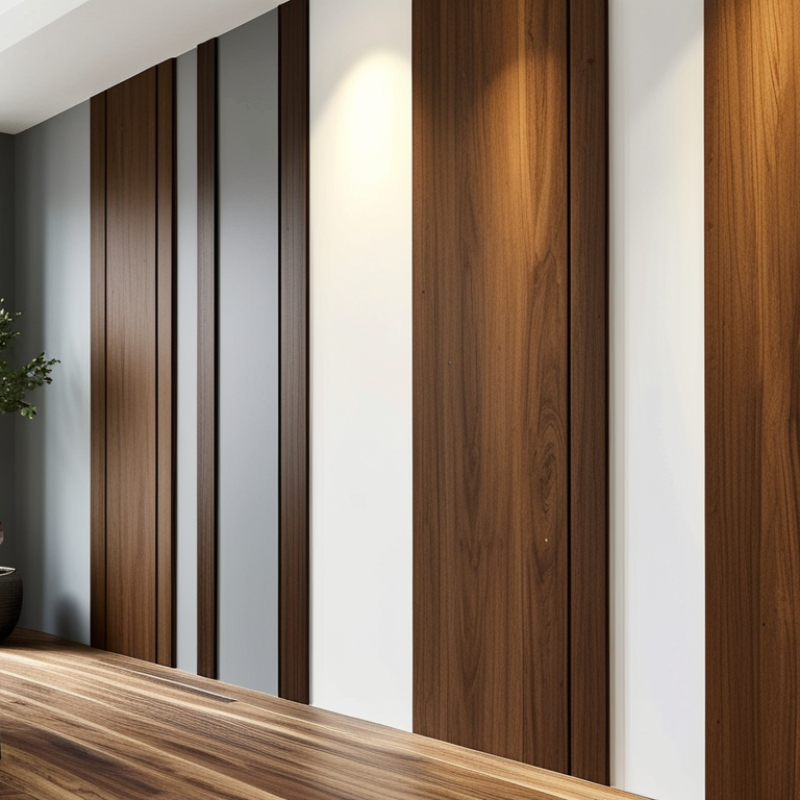
7 Tips for Choosing 3D WPC Wall Panels
3D WPC wall panels are decorative boards made from wood fiber or flour, thermoplastic resin, and performance additives. The mixture is heated, blended, and pushed through an extrusion mold. Rollers or shaped molds create the raised surface, while cooling stabilizes the profile. Some panels receive embossed finishes, protective films, or color coatings. The final texture may resemble fluted wood, stone, or geometric reliefs. It looks architectural, but the material begins as a carefully controlled composite.
Tips: Check the wood-to-polymer ratio, panel density, and dimensional tolerance. Denser panels usually feel more stable, though density alone proves little. Ask for moisture, formaldehyde, and fire-performance test reports when the project requires them. Inspect the back surface too. A weak backing can complicate installation. Choose a texture that suits your lighting, because deep grooves collect visible dust. Confirm the joining method before ordering. Small mistakes become expensive on a full wall.
Experienced installers also examine color consistency across several cartons. Slight variation can occur, and pretending otherwise is poor advice. Panels may resist everyday humidity, but they are not automatically waterproof. Confirm the manufacturer’s technical data for bathrooms, kitchens, or poorly ventilated rooms. Measure the wall carefully, including openings and corners. Leave the recommended expansion gap. It is easy to overlook this detail. Select panels with clear installation instructions, traceable test documentation, and replacement availability. Seven tips sound simple, yet the material’s actual performance depends on formulation, storage, cutting, and installation quality.
When assessing 3D WPC wall panels, examine the panel edge before the showroom surface. A clean, compact edge usually indicates consistent manufacturing. Look for uneven particles, large voids, or a strong chemical smell. These details may reveal poor mixing or weak bonding. Tap several panels lightly. A dull, irregular sound can suggest internal gaps.
The core material affects strength, moisture resistance, and stability. Ask whether the panel uses wood fiber, PVC, or a blended composition. Check the density and thickness against the project’s needs. Hollow panels reduce weight, but they may feel less rigid during handling. Solid panels can perform better on busy walls, although they often cost more. Request test data for water absorption, bending, and dimensional change. Do not rely on a product label alone.
Documentation matters.
Surface finish deserves close inspection under angled light. A convincing wood grain should feel varied, not mechanically flat. Check whether the embossed pattern aligns with the printed texture. Inspect corners for peeling film or exposed substrate. A matte finish can hide minor marks, while glossy surfaces show dust and scratches quickly. I once approved a sample that looked excellent indoors, but its color shifted near a bright window. That mistake changed my inspection routine. Now, I compare samples under warm, cool, and natural light. Small details matter. Also, ask how the surface should be cleaned. Harsh chemicals may damage protective coatings, even when the panel appears durable.
7 Tips for Choosing 3D WPC Wall Panels?
Choosing the right dimensions starts with the wall, not the catalogue. Measure height, width, outlets, doors, and visible corners twice. Large panels create fewer joints and a calmer appearance in spacious rooms. Smaller panels work better around shelves, columns, and narrow hallways. A 600-millimetre panel can feel oversized in a compact entrance. I once underestimated a doorway return. The installation needed an extra cut.
Pattern depth changes how the wall behaves visually. Shallow geometric grooves suit offices and bedrooms because they create texture without dominating the room. Deeper waves or fluted designs can become a feature wall behind a sofa or reception desk. Keep repeated patterns aligned across adjoining panels. Misalignment is immediately noticeable. Grand View Research’s 2024 wood-plastic composites market analysis identifies construction as a major application area, supporting the growing use of WPC in interior projects.
Color should respond to daylight, furniture, and room purpose. Light beige, soft grey, and warm white can make a narrow room appear more open. Charcoal and walnut tones add visual weight, but they may reduce brightness beside small windows. The U.S. Department of Energy notes that lighter surfaces reflect more light than darker ones, a useful principle for interior color planning. Request physical samples. Digital screens distort warmth and contrast. My first online choice looked refined, yet the installed shade felt colder than expected. Test samples beside flooring during morning and evening light. Trend data helps, but your actual room decides.
Choosing the right panel dimensions, patterns, and colors can improve installation efficiency, visual balance, and the perceived size of your space.
How to read the chart
The coverage area is calculated from each panel’s stated width and height. Larger panels can reduce the number of visible joints, while smaller formats may be easier to position around windows, corners, and other details.
Choosing 3D WPC wall panels starts with the wall, not the pattern. During site checks, I look for damp spots, loose paint, cracks, and uneven joints. A dry, firm, clean surface supports better adhesion. Tip one: use a two-metre straightedge to find dips. Tip two: measure height and width twice. Measure twice. Small errors become visible around corners. For masonry, concrete, drywall, and existing tile, confirm that the fixing method suits the substrate. A panel can look light, yet several panels create a meaningful load. Good planning prevents a weak bond.
The installation method should match the room and wall condition. Construction adhesive may work on smooth, sound surfaces, while screws or battens provide more control on uneven walls. Mechanical fixings need suitable anchors, not guesswork. Tip three: test one panel before covering the room. Test first. Tip four: leave the expansion gap recommended for the material. Keep panels away from persistent water unless the system is specifically rated for it. I also mark stud lines, outlets, and pipe routes before drilling. That step feels slow. It can prevent expensive damage.
Prepare a sharp utility knife, fine-tooth saw, level, tape measure, square, drill, suitable bits, spacers, and a caulking gun. Tip five: cut the visible face carefully and support the panel during trimming. Tip six: dry-fit corners and repeat patterns before applying adhesive. Tip seven: check alignment after every two or three panels. Corners reveal flaws. I once trusted a slightly sloping ceiling and regretted it; the final strip exposed the mistake. Rechecking with a level is less elegant than fixing a crooked row. Follow the panel maker’s technical sheet, and ask a qualified installer when the wall has moisture, structural movement, or hidden services.
| Tip | What to Check | Suitable Installation Method | Recommended Tools | Wall Compatibility | Practical Acceptance Criteria |
|---|---|---|---|---|---|
| 1. Confirm panel specifications | Review panel thickness, width, length, weight, profile depth, and the manufacturer’s installation instructions. | Use the fixing method specified for the panel profile, such as adhesive, screws, clips, or a combination. | Tape measure, straightedge, product documentation, calculator. | The wall structure must be able to support the combined weight of panels, battens, and fasteners. | Panel dimensions and fixing requirements are recorded before ordering or cutting. |
| 2. Inspect the wall surface | Check for dampness, dust, loose paint, cracks, grease, uneven areas, and existing wall damage. | Direct bonding is generally suitable only for clean, dry, stable, and reasonably flat surfaces. Use a subframe for irregular walls. | Moisture meter, spirit level, scraper, cleaning cloth, filler, sanding block. | Concrete, masonry, plasterboard, and sound painted walls may be suitable after proper preparation. | The surface is dry, firm, clean, and flat enough to prevent visible panel distortion. |
| 3. Choose between adhesive and mechanical fixing | Consider panel weight, wall condition, access for repairs, and the expected level of impact or vibration. | Adhesive can suit lightweight panels on stable walls; screws or clips provide additional support for heavier panels or uneven substrates. | Compatible construction adhesive, drill/driver, suitable anchors, screws, clips, caulking gun. | Fasteners must match the substrate, while adhesive must be compatible with both the WPC surface and wall finish. | The fixing plan prevents panel movement, open joints, and detachment during normal use. |
| 4. Plan the layout and expansion allowance | Measure wall length and height, locate corners and openings, and plan where joints will fall. | Install from a straight reference line and follow the specified joint and perimeter clearances. | Laser level or spirit level, chalk line, pencil, spacers, square, tape measure. | Allowances are especially important where indoor temperature or humidity changes significantly. | Rows remain aligned, patterns are continuous, and perimeter gaps are concealed with suitable trim. |
| 5. Select cutting and drilling tools carefully | Check whether the panel can be cut cleanly without chipping, melting, excessive dust, or damaged decorative surfaces. | Support the panel fully during cutting and make trial cuts on an offcut before installing visible pieces. | Fine-tooth saw, circular saw with a suitable blade, jigsaw, drill bits, clamps, eye protection, dust mask. | Tool selection should match panel density and the requirements for electrical boxes, pipes, corners, and outlets. | Edges are straight, cutouts are accurately positioned, and the visible face is free from major damage. |
| 6. Check moisture and location suitability | Identify exposure to water, steam, condensation, heat, sunlight, and repeated cleaning. | Use only in locations covered by the panel’s technical rating; provide ventilation and seal details where required. | Moisture meter, ventilation inspection tools, compatible sealant, trim, protective gloves. | A WPC panel may tolerate routine indoor humidity, but suitability for wet areas depends on the specific product and installation system. | There are no active leaks, the substrate is dry, and all exposed edges are treated according to the instructions. |
| 7. Test a sample installation first | Evaluate color, 3D shadow lines, joint appearance, adhesion, fastener placement, and cleaning response. | Install a small sample section using the proposed method before completing the full wall. | Sample panel, proposed adhesive or fasteners, level, cutting tools, cleaning materials, camera. | The test should use the same wall type, environmental conditions, trims, and fixing system planned for the project. | The sample remains secure, aligned, visually acceptable, and free from noticeable gaps or surface defects. |
Comparing Durability, Maintenance, Cost, and Supplier Support
Choose panels by density, core structure, surface coating, moisture resistance, and tested impact performance. A heavy panel is not automatically stronger, but very light panels may flex around screw points. ASTM D7031 provides guidance for evaluating wood-plastic composite performance, although it is not a complete wall-panel certification. Ask for test results, not attractive showroom claims.
Check ultraviolet stability and water absorption before judging durability. Grand View Research reported that the global wood-plastic composites market was valued at about USD 7.49 billion in 2023, with growth expected through 2030. Rapid market growth also means uneven quality. Inspect a sample after cutting it. Look for brittle edges, hollow sections, or color differences. These small details often appear before installation problems.
Maintenance should involve simple dusting and mild soap, not aggressive solvents. Request the recommended cleaning frequency and confirm whether replacement slats remain available. Compare total installed cost, including trims, fasteners, labor, waste, and future repairs. A low panel price can become expensive after poor cutting or repeated replacement. Supplier support matters too: require batch information, installation drawings, moisture guidance, and a written warranty. The Freedonia Group identifies residential and commercial construction as important WPC demand areas, yet supplier service still varies widely. Some guidance may be incomplete. That is why a physical sample, documented testing, and one technical conversation remain more reliable than a glossy catalogue.
: They combine wood fiber, thermoplastic resin, and performance additives. The mixture is heated, blended, and shaped through an extrusion mold. Rollers create raised textures. Cooling stabilizes the final profile.
Common designs resemble fluted wood, stone, waves, or geometric reliefs. Some panels include embossed surfaces, protective films, or color coatings. Deep grooves look dramatic. They also collect more dust.
Ask about the wood-to-polymer ratio, density, and dimensional tolerance. Inspect the front and back surfaces carefully. A weak backing may complicate installation. Request moisture, formaldehyde, and fire-performance test reports when needed.
Measure the wall, doors, outlets, corners, and ceiling height twice. Large panels reduce joints in spacious rooms. Smaller panels suit narrow hallways and areas around shelves. A 600-millimetre panel may overwhelm a compact entrance.
Shallow grooves create quiet texture in bedrooms and offices. Deep waves can form a strong feature wall behind seating. Light beige, soft grey, and warm white can make small rooms feel brighter. Dark tones add weight but may reduce brightness near small windows.
Not completely. Screens can distort warmth and contrast. Request physical samples and place them beside the flooring. Check them in morning and evening light. My first online choice looked refined, but the installed shade felt colder.
The wall should be dry, firm, clean, and reasonably level. Check for damp spots, loose paint, cracks, and uneven joints. Use a two-metre straightedge to locate dips. A light panel still adds weight across a full wall.
Prepare a level, tape measure, square, drill, suitable bits, saw, knife, spacers, and caulking gun. Test one panel before covering the room. Dry-fit corners and align repeated patterns before applying adhesive. Leave the recommended expansion gap. Check alignment after every two or three panels.
Choosing the right 3d Wpc Wall Panel starts with understanding its composition and manufacturing process. These panels typically combine wood fibers and polymer materials to create a decorative, moisture-resistant surface with three-dimensional texture. When comparing options, examine the core density, bonding quality, edge strength, and surface finish. A well-made panel should have consistent patterns, smooth coloring, and minimal defects. Consider the room’s style, lighting, and size when selecting panel dimensions, textures, and colors, ensuring the design complements rather than overwhelms the space.
Installation requirements are equally important. Check whether the panels use adhesive, clips, or another fixing method, and confirm that your wall is clean, dry, level, and structurally suitable. Before purchasing, compare expected durability, cleaning needs, resistance to moisture and wear, total cost, and available accessories. Reliable supplier support, clear installation guidance, accurate product information, and responsive after-sales service can make the project easier and help ensure long-term satisfaction.

Rongsen